How to Start a Money-Making Blog
Blogging is one of the most popular platforms on the Internet. It allows people to share ideas, be social and make a few dollars on the side. It’s such a powerful tool that many businesses incorporate blogs onto their sites to help drive traffic and improve marketing.
In reality, setting up a blog isn’t all that difficult. As long as you have an idea of what you wish to create, you can literally start engaging readers today.
While blogging does have great potential to generate a residual income, be aware that it will take a bit of effort. In fact, your success will be directly connected to the amount of work you put into blogging.
So, how do you start a blog today and add to your financial future?
Step 1: Choose Hosting Options
Before you can start building a blog, you need to establish where it’s going to be located and its name. After all, people need to know where to go to read your content.
Select a Web Host
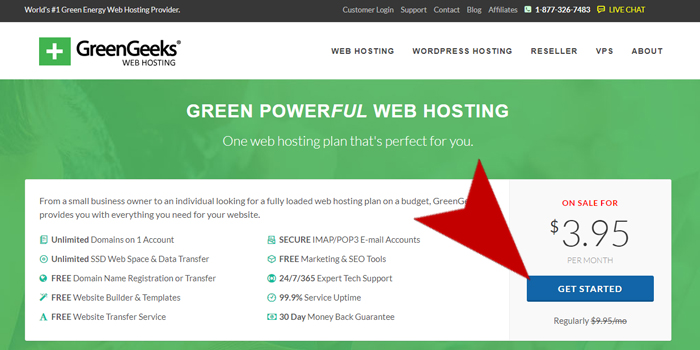
The first thing you’ll need is a good web host provider. I suggest using GreenGeeks.com when building your blog. Not only does the company have all the tools you’ll need to set up an amazing site, but GreenGeeks also contributes to environmental improvement.
GreenGeeks provides unlimited storage, bandwidth and free marketing tools to help you share the blog. Combined with a 30-day money back guarantee, you’re not out anything but time should you decide blogging isn’t for you.
Decide on a Domain Name
Choosing a domain name is important. This is the address people are going to use to visit your blog. You want it to be short and sweet, but it also needs to be relatable to the content. For instance, you would use something like “BobsBarbecuePit.com” if you were named “Bob” and wanted to share barbecue recipes.
Your domain name should be easy to identify and type into a web browser. It will essentially be your main branding point of the blog. The domain is also something you’ll have to stick with for a long time unless you change it later, which is a time-consuming process.
GreenGeeks can help you determine a good domain name. Plus, you get a free domain when you register through the company. This may save you a bit of money the first year as other brands tend to charge for domain name registration.
Install Blogging Platform
Once your hosting is established and your domain name is active, it’s time to install a blogging platform. One of the most common tools to use is WordPress. This powerful system accounts for approximately 60 percent of the market share for websites that use a content management system.
WordPress is easy to use, has tens of thousands of free additions to choose from and is customizable to create any kind of website you wish. If you use GreenGeeks, installing WordPress consists of using Softaculous to automatically add WordPress to your hosting account.
Putting it All Together
To set up a new hosting account, visit GreenGeeks.com and click the “Get Started” button.
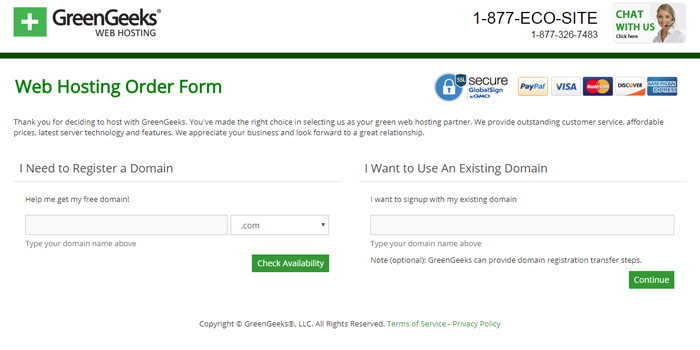
In the next screen, you’ll either register a new domain name or you can transfer one you already have. If this is a new blog, you’ll want to choose a new free domain.
If you’re having troubles picking a name that doesn’t already exist, here are a few ideas to try:
- Replace certain words with synonyms
- Use terms such as “My” or “Your” before the domain name, as long as it makes sense
- Consider using a “.net” or other top-level domain suffix instead of .com
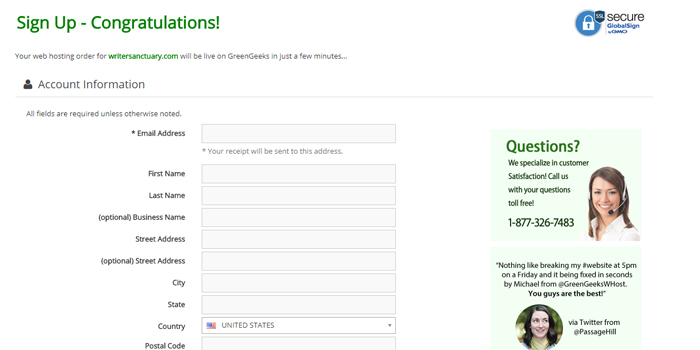
Once you find a domain name you like, you’ll access the Account Information page. In this section, you’ll fill out details of the account such as your name and address.
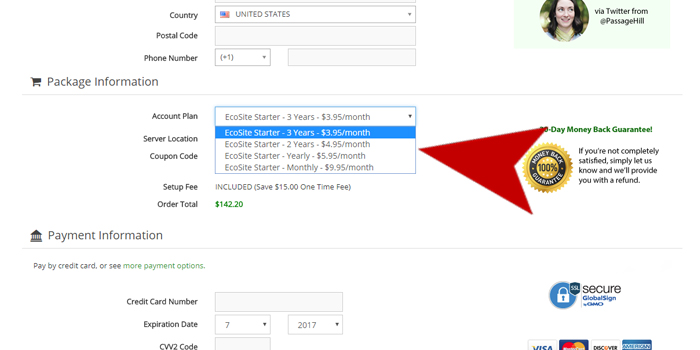
Next, you’ll select a package type. GreenGeeks has very competitive pricing, especially if you pay for three years in advance. This will make maintaining your blog cost less than what you might spend on coffee each month.
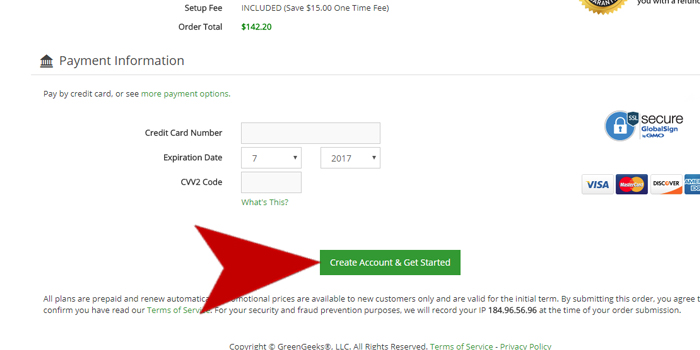
After choosing your plan, input your payment information and click the button to “Create Account & Get Started.”
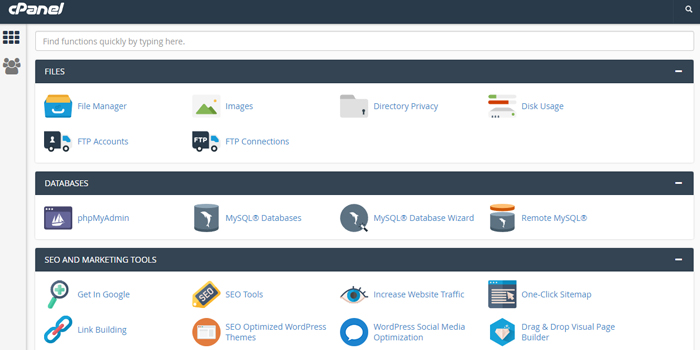
When your account is set up, you’ll have access to cPanel. This is the management tool GreenGeeks uses on its hosting platforms. It’s a feature rich platform that gives you access to all kinds of goodies regarding your blog.
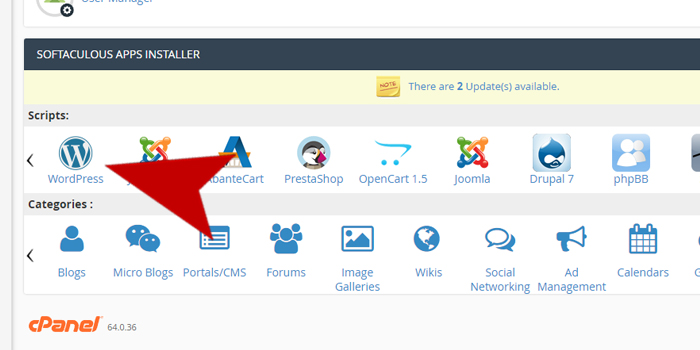
In cPanel, you’ll find the Softaculous Apps Installer near the bottom. This will have the most popular scripts for building websites. Click “WordPress” and Softaculous will guide you through the setup process. It’s easy to follow and takes just a few minutes to complete.
Step 2: Install Plugins and Themes
One of the reasons why WordPress is such a popular platform is because of the plugins and themes which are available. These are add-on files that help you customize the blog. For instance, you can add a nutritional display like you see on food packages if you create a blog about recipes and want to show how healthy they are.
Themes
Themes are easy to install and replace in WordPress. All it takes is a couple clicks of the mouse and you can change what your site looks like. These additions come in a vast array of styles and layouts. This means it’s very possible to find the perfect appearance for your blog if you take the time to search through the database.
Plugins
As I mentioned, plugins add more functionality to the website. From keeping your blog safe from hackers to adding a photo gallery, there are many to choose from. Here are a few types of plugins you may want to install immediately:
- Firewalls and Security
There are a number of safety plugins available to keep your blog safe. One of the more popular is that of WordFence Security. This plugin comes with file scanning, real-time blocking and monitoring features. - Search Engine Optimization
All websites should have some form of search engine optimization. WordPress has a number of these available such as Yoast SEO. The plugin not only helps optimize your site, but it will also analyze your content and give you suggestions. - Proofreading
Even the best writers make mistakes. A proofreading tool helps tighten your blog’s content and make it more legible. In the Jetpack plugin, there is a module specifically for proofreading. It installs a button in your WordPress editor for easy access. - Social Media Engagement
Social sharing is available in many different plugins including Jetpack. Another good plugin to consider is Social Share Buttons. It has several templates available and is easy to set up.
Step 3: Start Creating Content
After setting up the blog, it’s time to start creating content. The best thing about owning your own blog is that you can write as much or as little as you want. Just keep in mind that it takes a lot of quality posts to drive traffic.
Many experts attest to how evergreen content is some of the best to create. The term “evergreen” means that the blog post will remain relevant even if a visitor reads it 10 years down the road. This type of content usually remains higher in search engines for a longer duration because the material is still relevant.
Here are five tips to help you get started:
- Keep content based in facts and cite examples. It boosts SEO as well as the blog’s reputation.
- Keep it simple to read. Experts believe writing between 7th and 9th grade levels is the most effective.
- Use headers and sub-headers. It helps break up the content and allow for an easier read.
- Don’t use super long paragraphs. It creates a wall of text that is distracting on the eyes, especially if the blog is read from a mobile device.
- Keep the content relevant to your blog. If your site is about boats, you wouldn’t want to blog about cats…unless the cat is on the boat. This is important for SEO as it demonstrates relevancy during a search.
Step 4: Market the Blog
While good content engages an audience, those visitors won’t know it exists unless you have a sitemap. This is the file you use to submit your blog to search engines like Google and Bing. Luckily, plugins like Yoast will help you create this file.
An effective method for marketing a blog is using social media. Because sites like Facebook allow people to create free pages for websites, it’s a marketing tactic that is beneficial. It keeps your personal and blogging comments separated. As a result, your blog appears more professional.
Blog submission sites are useful to attract an audience. By submitting your address to these platforms, your posts are delivered to a wide audience. However, not all of them are overly successful. It may take a bit of effort to find good blog-sharing websites.
Step 5: Monetize Your Site
Monetizing the blog is relatively easy. The two most popular ways are: ad revenue and affiliates.
Ad Revenue
Systems like Google Adsense give you advertisements to place on your blog. If people click on them, you earn money. These ads are often determined by what the visitor has been searching for in the past and the content of your website.
Affiliates
Using affiliate systems like ShareASale.com can be quite beneficial for generating cash. Essentially, you place ads on your blog which you choose from a long list of retailers. You place a banner or text link on your website from those companies. If a visitor clicks a link and makes a purchase, you earn a percentage of the sale.
Enjoy the Rewards!
Many find starting a blog to be therapeutic, fun and often lucrative. It’s a way to connect with others from around the globe who share the same interests. Just don’t expect an overnight success. Depending on your effort, the topic of the blog and how well you market the site, it could take some time to attract a large audience.
So, what are you waiting for? These are the quick and easy steps on how to start a blog and begin earning monthly residual income.




There are many bloggers who post a blog free of cost. This article gives idea that how we gain income from blog. I just want this.