

Fan of Instagram?
Who isn’t? After all, Instagram has over 116 million users in the US alone. It is now one of the most popular and widespread social media platforms. It allows users to update friends and family about their lives with a photo gallery.

Do you have any Instagram photos you want to save? In this article, we give you some tips on how to save Instagram photos. Read on to find out more!
1. Bookmark Instagram Images
In 2016, Instagram added a new feature that allowed users to bookmark images. If you want to save Instagram photos to view later, try using the bookmark feature. You can do this by looking for the image you want to save.

Under the photo, you will find a heart, comment, and bookmark icon. You may bookmark the photo to save it to your account. To organize your saved photos, press and hold the bookmark icon and create or select a collection.
2. Make a Smart Album
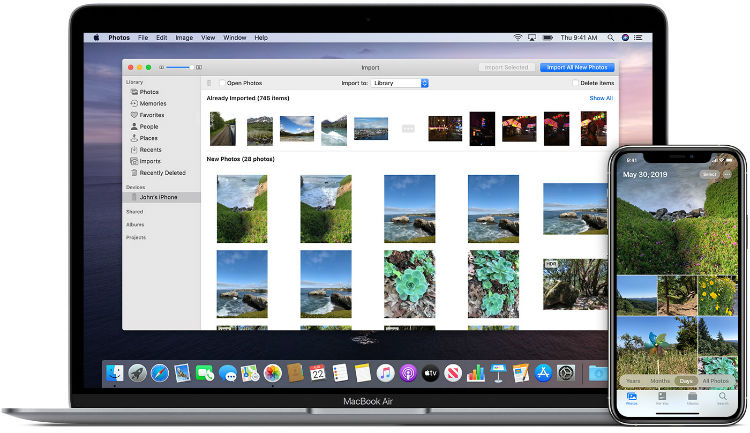
If you’re a Mac user, there are several ways to organize your Instagram photos. First, download the photos you want to save to your device. Find an Instagram photo download app here.

Open your images in the Photos app and do the following:
- Select File, then New Smart Album.
- Under Match, select Person, Includes [Name].
- Click on the + button to add more criteria or restrict photos.
- Besides Showing, select the drop-down icon.
Select All Items if you have no restrictions. You may also narrow your photos by Videos, Photos, or Favorites. You can also choose a keyword.
3. Create an Album
To create a regular photo album, open Photos. The Photos app can sort your photos into collections. It groups images based on dates and locations.
To create an album, do the following:
- Select the Albums column on the left-hand side of your screen then click the + button. You may also select File > New Album.
- Name your new Untitled Album.
- Select images to add to your new album.
You can add photos to your album by clicking on Photos. You may also visit another album or go to Face, Places, or Favorites. Drag and drop any photos in videos you want in your new album.
4. Use Photos People Feature
Your Mac’s Photos app comes with a feature that helps you find faces. In the left column under albums, select the People album. This will show you a grid of faces that your Mac has identified.

You can double-click on the face to view all photos associated with is. Hover over a photo and select Add Name to name an identified face.
5. Favorite Photos
Adding photos to your Favorites is the easiest way to organize your photos. To Favorite, an image, hover over the image’s thumbnail. In the bottom left corner of the thumbnail, select the heart icon.
6. Add Photos to Existing Album
Consider adding new photos to an existing album. You can select multiple photos by holding your Command key while highlighting photos. You can also use a marquee tool with your trackpad or mouse.
You can also select one image. To add photos into an existing album, drag the highlighted photos to the name of the album. You may also opt to right-click on a group of highlighted photos, then select Add To and choose the name of the album.
7. Make a Shared Album

Do you want to share your saved Instagram photos with friends and family? Consider making a shared album. This allows them to not only see photos, but add photos, comments, and likes.
- In the sidebar, hover over Shared Albums and select the + button.
- Add a name and invite people from your contacts.
- Select photos.
A shared album is a great Instagram photo viewer for friends and family who don’t use social media. It allows you to update everyone and share more memories. You may also turn this into a public website that anyone can view on iCloud.com with a URL.
8. Use Photos Search Feature
Making new albums is a great way to organize your Instagram photos. But you don’t need to make more albums to browse through your library. Photo is an intuitive app that makes searching easy.
Apple made the Photos app so that it could recognize objects in your pictures. In the Search field, type an object. Photos will retrieve any pictures that match this keyword. Using hashtags is another useful hack to increase visibility. So get hashtags from Flick to get more exposure for your content.
9. Move Photos to a Hard Drive
Do you want to save Instagram photos to your device but don’t have enough space? Consider moving your photos to a hard drive. Using a hard drive is a great way to organize and backup your photos.
Low storage can slow down your Mac and affect simple processes. If your Mac is running out of space, try using a hard drive instead. You may also move other files like documents and PDFs to make room for more photos.
10. Upload Photos to iCloud
Another way to organize photos while saving space on your Mac is by using iCloud. iCloud is Apple’s cloud storage solution. It is available for both Mac and non-Mac users.

Free iCloud users get 5GB of cloud storage across all connected devices. If you want more space, you can upgrade your iCloud. Upgrades range from 99 cents per month for 50 GB to $9.99 for 2TB.
If you want to free up space on your device without losing your photos, backup your images to iCloud. You may access these photos at any time through any device with an internet connection. You may also upload documents, PDFs, and other files.
Organize Your Instagram Photos Now
Now you know how to save and organize your Instagram photos on Mac. Take advantage of the tools available to keep photos readily available and to save hard drive space.
Of course, these aren’t the only Instagram tricks to utilize. To pick up even more cool tech tricks, feel free to read our other posts and guides right here, today!
